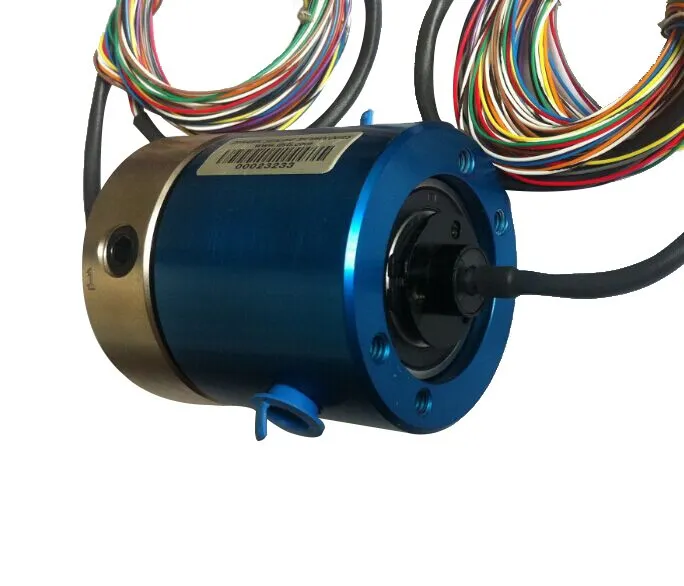
Mounting a gas slip ring on a machine is a crucial process that requires careful planning and precise execution. As a gas slip ring supplier, I have extensive experience in this area and understand the importance of getting it right. In this blog post, I will guide you through the steps of mounting a gas slip ring on a machine, providing you with valuable insights and practical tips to ensure a successful installation.
Step 1: Understand Your Machine and Gas Slip Ring
Before you start the mounting process, it's essential to have a clear understanding of your machine's requirements and the specifications of the gas slip ring you've chosen. Different machines have different operating conditions, such as rotational speed, temperature, and pressure. These factors will influence the type of gas slip ring that is most suitable for your application.
For instance, if your machine operates at high speeds, you'll need a gas slip ring that can handle the centrifugal forces and maintain a stable connection. On the other hand, if your machine is exposed to high temperatures or pressures, you'll require a gas slip ring that is designed to withstand these harsh conditions.
Take the time to review the technical documentation of both your machine and the gas slip ring. This will help you identify any potential compatibility issues and ensure that you have all the necessary tools and materials for the installation.
Step 2: Prepare the Mounting Area
Once you've selected the appropriate gas slip ring, the next step is to prepare the mounting area on your machine. This involves cleaning the surface where the gas slip ring will be installed and ensuring that it is flat and free of any debris or contaminants.
Use a clean, dry cloth to wipe down the mounting surface, removing any dust, oil, or grease. If necessary, you can use a mild solvent to clean the surface, but be sure to follow the manufacturer's instructions and allow the surface to dry completely before proceeding.
In addition to cleaning the surface, you may need to make some modifications to the mounting area to accommodate the gas slip ring. This could include drilling holes, tapping threads, or adding brackets or mounting plates. Refer to the installation instructions provided by the gas slip ring manufacturer for specific guidance on any necessary modifications.

Step 3: Install the Gas Slip Ring
With the mounting area prepared, it's time to install the gas slip ring on your machine. Start by carefully positioning the gas slip ring on the mounting surface, aligning it with the holes or mounting points. Use the appropriate fasteners, such as bolts or screws, to secure the gas slip ring in place.
When tightening the fasteners, be sure to follow the recommended torque specifications provided by the manufacturer. Over-tightening the fasteners can damage the gas slip ring or the mounting surface, while under-tightening can result in a loose connection and potential leakage.
Once the gas slip ring is securely mounted, connect the gas lines to the appropriate ports on the slip ring. Use the correct type of fittings and ensure that they are tightened properly to prevent any gas leaks. It's also a good idea to use a thread sealant on the fittings to provide an extra layer of protection against leaks.
Step 4: Electrical Connections (if applicable)
In some cases, your gas slip ring may also include electrical connections for transmitting power or signals. If this is the case, you'll need to make the necessary electrical connections following the manufacturer's instructions.
Start by identifying the electrical terminals on the gas slip ring and the corresponding wires or cables on your machine. Use the appropriate connectors or terminals to make the connections, ensuring that they are secure and properly insulated.
When making the electrical connections, be sure to follow all electrical safety procedures to prevent any electrical hazards. This includes wearing appropriate personal protective equipment, such as gloves and safety glasses, and ensuring that the power is turned off before making any connections.
Step 5: Testing and Calibration
After the gas slip ring is installed and all the connections are made, it's important to test the system to ensure that it is functioning properly. Start by checking for any gas leaks using a leak detection solution or a pressure gauge. If you detect any leaks, tighten the fittings or replace any damaged components as necessary.
Next, test the electrical connections (if applicable) to ensure that there is a proper electrical continuity and that the signals are being transmitted correctly. You can use a multimeter or other electrical testing equipment to perform these tests.
Once you've verified that there are no leaks and the electrical connections are working properly, you can calibrate the gas slip ring if necessary. Calibration may be required to ensure that the gas flow rate or pressure is within the desired range. Refer to the manufacturer's instructions for specific guidance on how to calibrate the gas slip ring.
Step 6: Maintenance and Troubleshooting
To ensure the long-term performance and reliability of your gas slip ring, it's important to perform regular maintenance and troubleshooting. This includes inspecting the gas slip ring for any signs of wear or damage, cleaning the gas lines and ports, and lubricating the moving parts as recommended by the manufacturer.
If you encounter any problems with the gas slip ring, such as leaks, electrical issues, or abnormal noise, it's important to address them promptly. Refer to the troubleshooting guide provided by the manufacturer or contact our technical support team for assistance.
Choosing the Right Gas Slip Ring for Your Application
As a gas slip ring supplier, we offer a wide range of gas slip rings to meet the diverse needs of our customers. Our product portfolio includes Pneumatics with Electical Hybrid Slip Ring, Hydraulic Slip Ring with Electrical Wires, and High Pressure Hybrid Slip Ring.
When choosing a gas slip ring for your application, it's important to consider factors such as the number of gas channels, the maximum operating pressure and temperature, the rotational speed, and the electrical requirements. Our experienced sales team can help you select the right gas slip ring for your specific needs and provide you with detailed technical information and support.
Contact Us for More Information
If you have any questions about mounting a gas slip ring on a machine or need assistance in choosing the right gas slip ring for your application, please don't hesitate to contact us. We are committed to providing our customers with high-quality products and excellent customer service. Our team of experts is available to answer your questions and help you find the best solution for your needs.
References
- Manufacturer's installation and operation manuals for gas slip rings.
- Industry standards and guidelines for gas slip ring installation and maintenance.